|
||
|
|
||


5 Graphical User Interface (GUI)
This section describes the graphical user interface of quaneko. The exact look and feel might be slightly different on your platform than it is shown in the screenshots.
The Main Application Screen
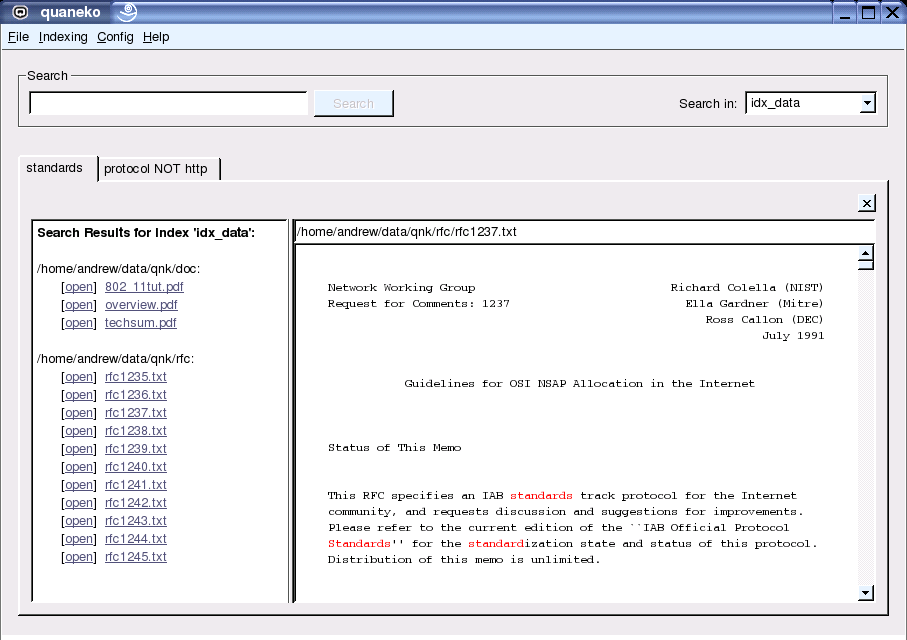
Figure 2: The main application screen of quaneko.
quaneko presents itself with a main application window that is split into three parts:
- The search control area. This is the top area where you can type a search query and select a search index.
- The result view at the left shows the result set of a query.
- The preview at the right previews the contents of a file in plain text.
Creating A New Index
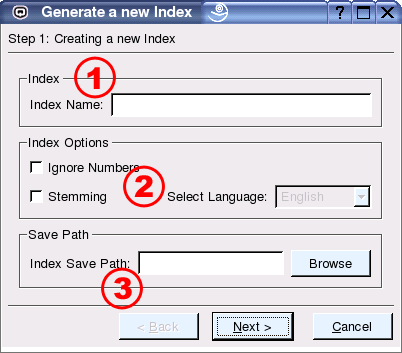
Figure 3: The first step of the wizard to create a new index.
Before you can search your documents, you have to setup and create an
index. Choose the menu 'Indexing' - 'Generate Index' to display the
wizard for creating a new index (see Figure 3).
In the first screen during the creation process there are 3 areas:
- Index Name: Type a unique name for your new index. The name is case sensitive.
-
Ignore Numbers: Tick to exclude numbers from being
indexed. If this is checked it means that you won't be able
to search for numbers such as years or numeric IDs.
Indexes without numbers can be considerably smaller, depending
on the files that are indexed.
Stemming: Tick to enable stemming. Stemming indexes the stem of words rather than the full word (e.g. "cycl" for "cycling", "cycled", "cycles" and "cycle"). It allows you to find all documents that contain any of those words by searching for any of them. Stemming typically reduces the index size by about 15 to 33%. If you activate stemming, you need to chose a language for the stemmer. If your documents are written in different languages, create individual indexes for them or disable stemming. - Index Save Path: Chose a directory where you want to store the index files. The files will be stored in a sub folder that is named like the unique index name. E.g. if you type "c:\temp" here and the index is called "MyData", the index files will be placed in "c:\temp\MyData\".

Figure 4: The second step of the wizard to create a new index.
In the second step of the index creation wizard you can parse an initial directory into the new index (see Figure 4). Choose the directory in which the documents are located that you want to index. You can add more folders or individual files to the same index later.
If all the given directories exist and the index name is a unique new index name, quaneko will now parse the files in the given data directory into the index. This can take some minutes or hours depending on the number and size of the data files. During the process you can see which directory and file is currently being processed.
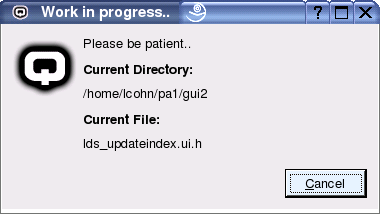
Figure 5: quaneko is parsing, converting and indexing the files.
Updating An Index
Choose the menu 'Indexing' - 'Update Index' to display the update dialog (see Figure 6). Updating an index means to parse all files and directories that were added since the last update to the index. Further, all files that have changed will be re-parsed. Depending on the number of files there are in the index, an update can take a rather long time.
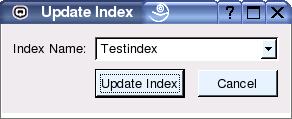
Figure 6: The update dialog.
Adding A Directory
Choose the menu 'Indexing' - 'Add Directory' to add an individual directory to an existing index (see Figure 7).
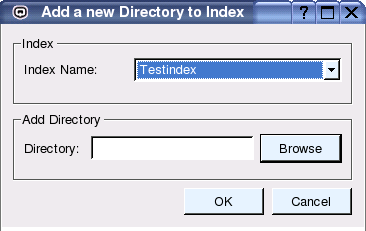
Figure 7: Adding A Directory.
Adding A File
Choose the menu 'Indexing' - 'Add Directory' to add an individual directory to an existing index (see Figure 7).
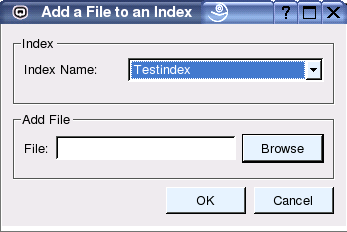
Figure 8: The Add a File Screen.
Removing An Index
Choose the menu 'Indexing' - 'Remove Index' to remove an existing index (see Figure 9).
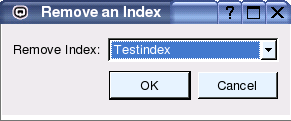
Figure 9: The Remove Index Screen.
|
[ 1 | 2 | 3 | 4 | 5 | 6 | 7 ]
This Manual was created with ManStyle.